

The Material
The text looks pretty dull with Maya's default grey material, so now we'll create and add a material to the text.
1. First, choose Window -> Hypershade. This opens up the Hypershade window where all materials are created and stored.
2. Then right-click and hold in an empty area of the main window, and choose Create -> Materials -> Phong. Release the button. Now the pointer should change to an arrow with a plus sign and a square below it. Now left-click in an empty area to add the new material to the Hypershade.
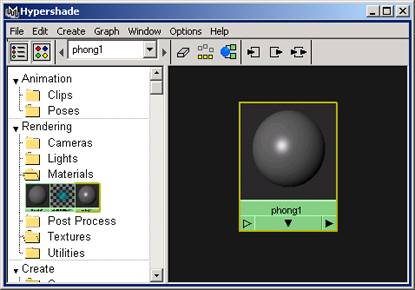
3. Now you should see a grey sphere with a white highlight on it. Now move the Hypershade window out of the way, and select the entire text by drawing a square around it, as you did earlier
4. Now move the Hypershade back into view and right-click and hold over the material you created and choose Assign Material to Selection. It is very important that you don't click anywhere inside the hypershade before you assign the material to you selection. If you left-click somewhere, no matter where, you deselect your text, and Assign Material to Selection wont have a selection to assign to.
5. After this is done, double-click the material to open the Attribute Editor for the material. This is where you change the appearance of the material.
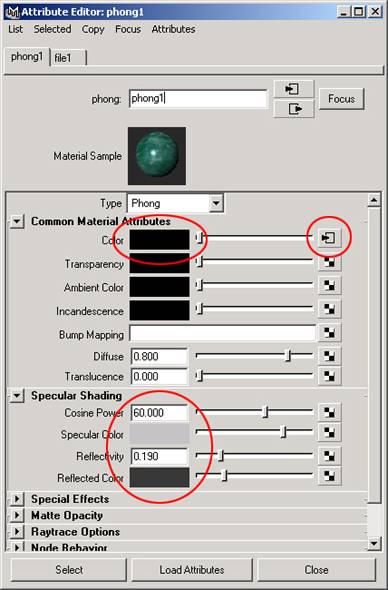
6. Now we'll change the color of the text to a burgundy red. To do this, first double-click the grey field next to Color. A color-chooser will appear, where you can choose the color you want for this material. I chose a dark, nice red. Notice how your text and the little preview sphere changes as you accept the color.
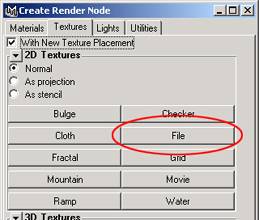
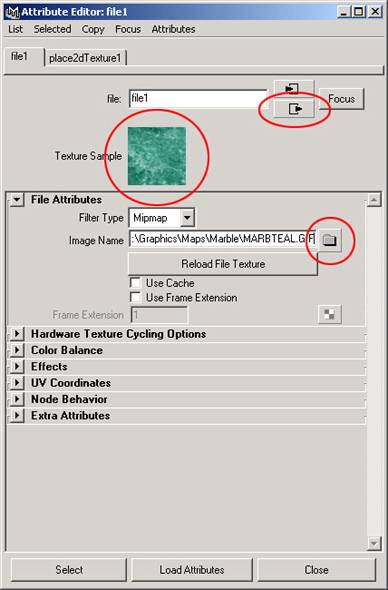
7. Lets say you also want to assign a bitmap-texture to your text. To do this you would first click the checkered button to the right of the Color slider. This creates a new render node. We're not going into detail about this, but choose File from 2D textures. Then the Attribute Editor window changes. To the right of the Image Name field is a button with a folder on it. Press that and a file chooser dialogbox should appear, where you can choose the texture you want.
8. When you have chosen a texture, you should see a preview of the imagefile in the Texture Sample. The texture should suddenly be applied to your text as well. To get back to the attributes of the material press the button with a square and a triangle pointing OUT of the square.
I'll now give a rough overview of what the most important attributes do.
| Transparency | Sets how transparent the material should be. You can set a specific color to be transparent, so that only the green parts of an object is transparent. |
| Cosine Power | Defines how wide or narrow the specular highlight on the material should be. The higher the value, the narrower highlight. |
| Specular Color | Sets the color of the highlight. |
| Reflectivity | Defines how much the material reflects. Most real-world materials don't reflect all that much, and it should be set to 0.000. This will also make rendering go faster. |
| Reflected Color | This defines which colors the material will reflect. |
Now close the Hypershade window. Now your text should look the way you want it to at least pretty rougly :)
| The Text |

